mcp for blender where the users can connect antigravity
🎨 Blender MCP Bridge
![]()
![]()
![]()
![]()
AI-powered Blender control via Model Context Protocol (MCP)
Send images to create 3D models with matching colors, execute Python scripts, and control Blender remotely through Antigravity or any MCP-compatible AI client.
✨ Features
| Feature | Description | |---------|-------------| | 🖼️ Image to 3D | Extract dominant colors from images and create 3D models with matching materials | | 🐍 Script Execution | Run any Blender Python code remotely through MCP | | 📊 Scene Query | Get detailed information about objects, materials, and collections | | ⚡ Real-time Updates | Receive live progress status during script execution | | 🔒 Thread-safe | Robust architecture with guaranteed responses and no deadlocks |
🏗️ Architecture
┌─────────────────────┐       MCP/stdio       ┌─────────────────────────┐
│     Antigravity     │◄─────────────────────►│  antigravity_blender_   │
│   (or any MCP AI)   │                       │  server.py              │
└─────────────────────┘                       └───────────┬─────────────┘
                                                          │
                                                          │ TCP Socket
                                                          │ (port 8081)
                                                          ▼
                                              ┌─────────────────────────┐
                                              │   blender_server.py     │
                                              │  (runs inside Blender)  │
                                              └─────────────────────────┘
📦 Installation
Prerequisites
- Python 3.10+
- Blender 4.2+ (with full path accessible)
- pip (Python package manager)
Quick Install
# Clone the repository
git clone https://github.com/MITHRAN-BALACHANDER/Blender-MCP-antigravity.git
cd Blender-MCP-antigravity

# Create virtual environment (recommended)
python -m venv venv
.\venv\Scripts\activate      # Windows
source venv/bin/activate     # Linux/Mac

# Install dependencies
pip install -r requirements.txt
Install as Package (Optional)
pip install -e .
🔌 Antigravity Integration
Add the following to your Antigravity MCP server configuration:
Option A: Direct Path
{
  "mcpServers": {
    "blender": {
      "command": "python",
      "args": ["C:/path/to/Blender-MCP-antigravity/antigravity_blender_server.py"],
      "env": {}
    }
  }
}
Option B: Using Virtual Environment
{
  "mcpServers": {
    "blender": {
      "command": "C:/path/to/Blender-MCP-antigravity/venv/Scripts/python.exe",
      "args": ["C:/path/to/Blender-MCP-antigravity/antigravity_blender_server.py"],
      "env": {}
    }
  }
}
Note: Replace
C:/path/to/with your actual installation path.
🚀 Quick Start
Step 1: Start Blender Server
# Navigate to project directory
cd Blender-MCP-antigravity

# Start Blender with the socket server
# Windows (use full path if 'blender' is not in PATH)
"C:\Program Files\Blender Foundation\Blender 4.2\blender.exe" --background --python blender_server.py

# Linux/Mac
blender --background --python blender_server.py
Expected output:
==================================================
[BlenderMCP] Server running on 127.0.0.1:8081
[BlenderMCP] Waiting for connections...
==================================================
Step 2: Connect Antigravity
Once Blender is running, Antigravity will automatically connect via the MCP configuration.
Step 3: Create 3D Content
Ask Antigravity to create 3D content:
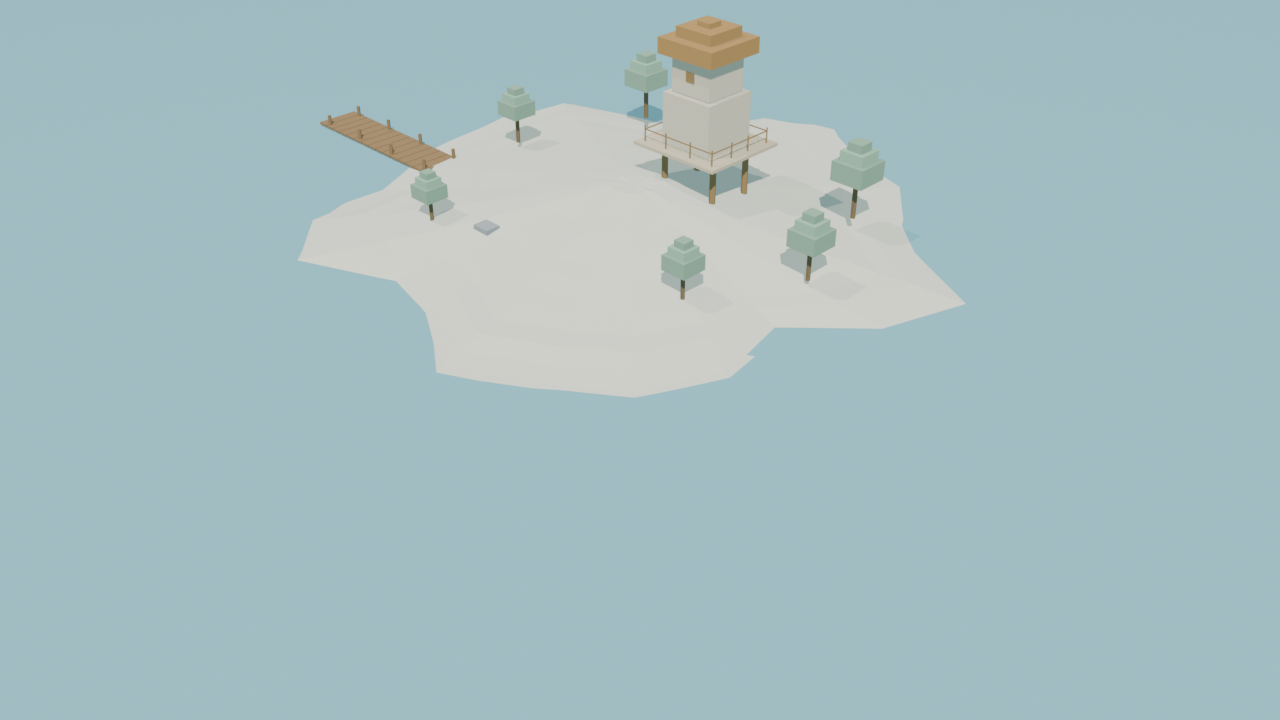
"Create a low-poly island scene in Blender"
"Create a 3D model from this image" (with attached image)
🛠️ MCP Tools Reference
image_to_3d_model
Create a 3D model with colors extracted from an image.
| Parameter | Type | Required | Default | Description |
|-----------|------|----------|---------|-------------|
| image_data | string | ✅ | - | Base64-encoded image |
| model_type | string | ❌ | "cube" | Shape: cube, sphere, cylinder |
| model_name | string | ❌ | "ImageModel" | Name for the object |
Response:
{
  "status": "ok",
  "colors": ["#3A7D8C", "#D4C4A0", "#4A6E4A"],
  "object_name": "ImageModel"
}
blender_exec
Execute Python code inside Blender.
| Parameter | Type | Required | Description |
|-----------|------|----------|-------------|
| script | string | ✅ | Python code to execute |
Script Requirements:
- ✅ Define and call a
main()function - ✅ Use
send_status("message")for progress updates - ✅ Use
bpy.data.*APIs (notbpy.ops.*) - ❌ No infinite loops or blocking operations
Example:
import bpy

def main():
    send_status("Creating cube...")
    mesh = bpy.data.meshes.new("Cube")
    obj = bpy.data.objects.new("Cube", mesh)
    bpy.context.collection.objects.link(obj)

    import bmesh
    bm = bmesh.new()
    bmesh.ops.create_cube(bm, size=2.0)
    bm.to_mesh(mesh)
    bm.free()

    send_status("Done!")

main()
get_blender_scene
Query the current Blender scene.
Response:
{
  "objects": [
    {"name": "Cube", "type": "MESH"},
    {"name": "Camera", "type": "CAMERA"}
  ],
  "meshes": ["Cube"],
  "materials": ["Material"],
  "collections": ["Collection"]
}
📁 Project Structure
Blender-MCP-antigravity/
├── antigravity_blender_server.py   # MCP server (AI client interface)
├── blender_server.py               # TCP server (runs in Blender)
├── antigravity_blender_addon.py    # Blender UI addon (optional)
├── run_via_bridge.py               # Standalone script runner
├── generate_island.py              # Example: procedural island
├── create_island_from_image.py     # Example: island from reference
├── requirements.txt                # Dependencies
├── pyproject.toml                  # Package config
└── README.md
🔧 Troubleshooting
Connection Refused
# Ensure Blender is running with the server
"C:\Program Files\Blender Foundation\Blender 4.2\blender.exe" --background --python blender_server.py

# Check if port 8081 is in use
netstat -an | findstr 8081   # Windows
lsof -i :8081                # Linux/Mac
Timeout Errors
- Check Blender's console for Python errors
- Ensure
main()is called at the end of your script - Add
send_status()calls for long operations - Avoid blocking calls or infinite loops
Port Already in Use
# Kill existing Blender processes
taskkill /F /IM blender.exe     # Windows
pkill blender                    # Linux/Mac
🎯 Examples
Run the Island Generator
# Activate venv first
.\venv\Scripts\activate

# Run example script
python run_via_bridge.py generate_island.py
Interactive Mode (View Output)
# Start Blender with GUI
"C:\Program Files\Blender Foundation\Blender 4.2\blender.exe" --python blender_server.py

# Then run scripts via bridge
python run_via_bridge.py your_script.py
🤝 Contributing
Contributions are welcome!
- Fork the repository
- Create a feature branch:
git checkout -b feature/amazing-feature - Commit changes:
git commit -m 'Add amazing feature' - Push:
git push origin feature/amazing-feature - Open a Pull Request
📄 License
MIT License - see LICENSE for details.
🔗 Links
- Repository: github.com/MITHRAN-BALACHANDER/Blender-MCP-antigravity
- Blender: blender.org
- MCP Protocol: modelcontextprotocol.io
- Antigravity: antigravity.dev
Made with Mithran Balachander